By Jay Whimpey
A Design Concept for a Multi-use Fallout Shelter
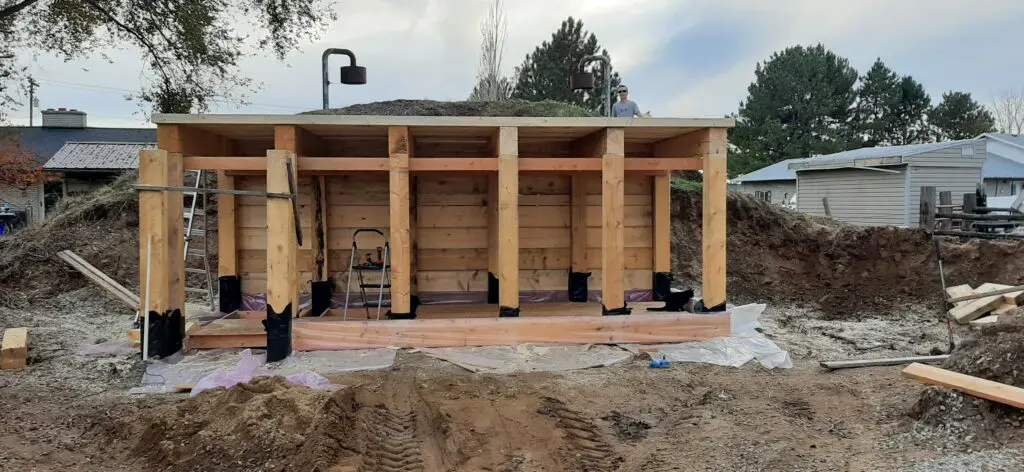
Fallout shelters were very popular in the 1960’s but then fell out of favor until recently. In order to help interested individuals who my have a desire to build a functional fallout shelter the following concept is presented here as a viable option. No concept is proven until it is actually demonstrated so the materials were obtained and a fallout shelter was built using a heavy wooden post and beam structure with plastic sheeting to protect the wood from moisture in the soil.Â
This concept is pretty easy to scale to larger or smaller structures by making the 8-foot by 20-foot structure shorter or reducing the width. Or by making it longer or wider. If it is made wider it can be increased in 8-foot increments and adding more rows of posts. The engineering indicated that wider spans than 8-feet are not advisable with the 8†by 12†beams with up to 3-feet of soil cover. The structure must be built in an area where ground water will not be a problem.
Materials
The materials were obtained during the height of the building boom where normal construction materials were prohibitively expensive so it was decided to use rough cut lumber directly from a saw mill that was not nearly as expensive as the dimensioned and kiln dried lumber normally used in house construction. The structure was fastened together using lag screws of the appropriate length and diameter to provide a solid structure with reliable fasteners .Â
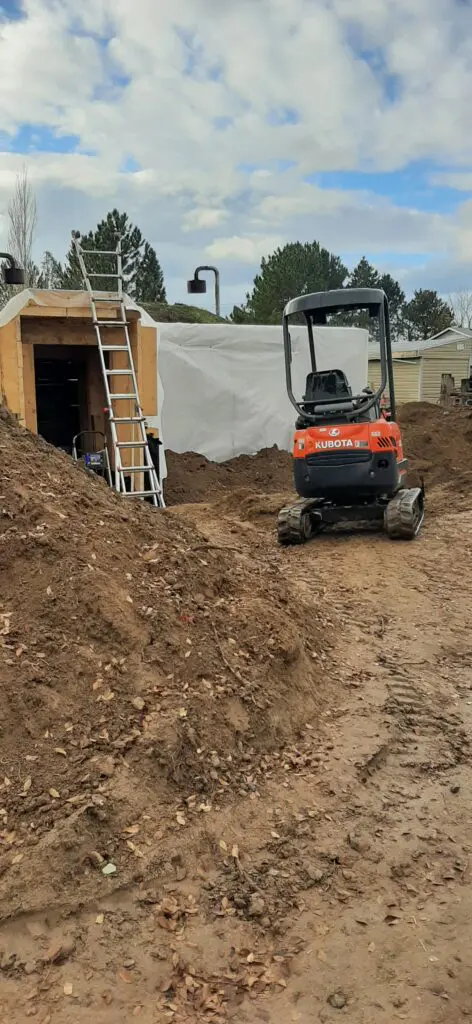
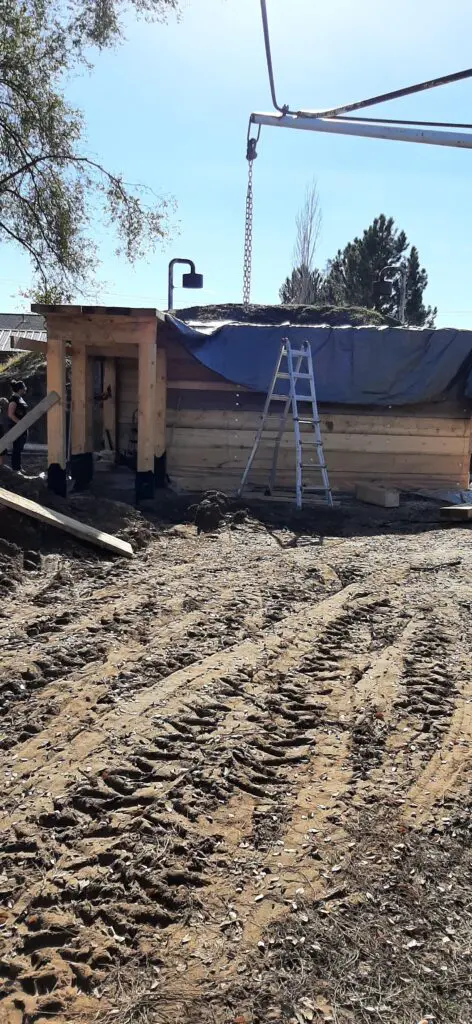
The finished structure was covered with 6 mil sheet plastic and was covered with soil. The structure was placed into a small hill and a fair amount of soil was excavated prior to construction. Crushed rock was placed between the structure and the upside of the hill to prevent water from putting any lateral pressure on the structure.Â
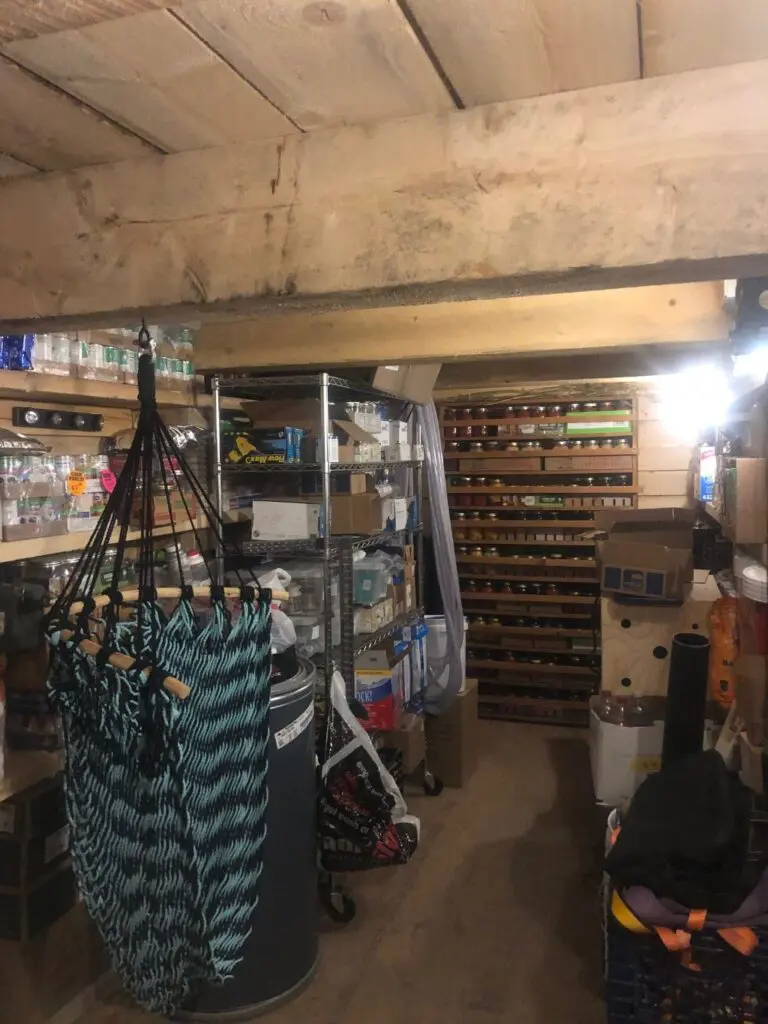
Sand was placed under the structure to help with moisture management also. The result was an underground structure that is aesthetically pleasing yet very functional in that it protects from freezing, excessively high temperatures during the summer, rain and snow, and even appears to offer some protection from EMP since there is not cellular phone reception in the shelter. It is an excellent place to store perishable foods like the cellars that our ancestors used for that purpose.
Construction Details
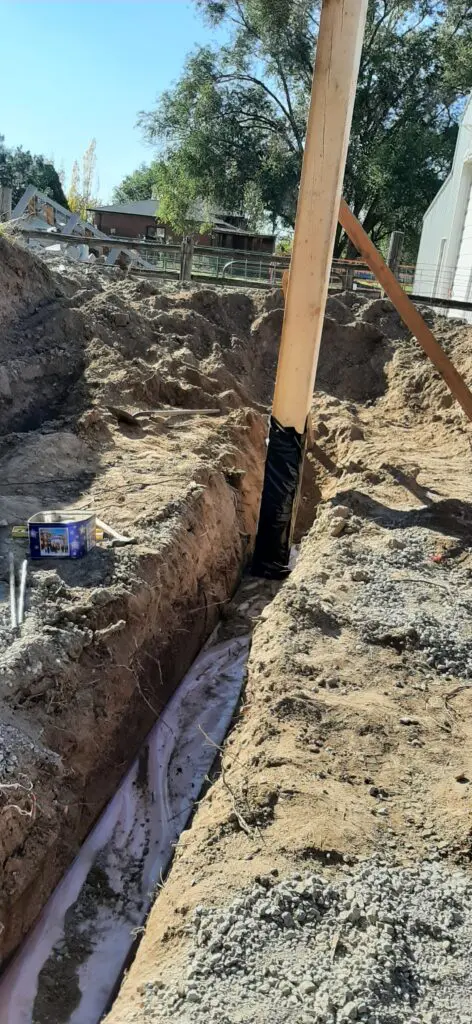
The footings for the structure are 4†by 12†planks that are wrapped in plastic sheeting and are placed in an excavated trench below the frost line. Lag bolts (8†long and ½†diameter) are placed in the plank at 4-foot intervals to help with proper placement of the posts and to keep them from sliding off the footing. The bottom of the 8†by 8†posts are pre-drilled with a hole to accept the lag screw and the lower 4-feet of the posts are also covered in plastic.Â
The demonstration shelter had a length of 20-feet and a width of 8-feet with posts being placed on 4-foot centers. It is important that the footing plank extend at least 1-foot beyond the last post in order to provide proper support. Shorter footing planks are used to support additional posts for the entry way to the shelter. The posts were specified to have extra length and then are cut to the appropriate height once they are all in place. A transit or laser leveling device is very useful for establishing the vertical baseline to ensure that the posts are cut off evenly.
The structure and construction methods are tolerant of some imprecision on the height, plumbness, and squareness of the structure so a chainsaw can be used for topping the posts and for final trimming of the side and top planks. The rough-cut lumber was not totally uniform but that was not critical with this construction method. The lumber was ordered with extra length so that minor variations did not matter.Â
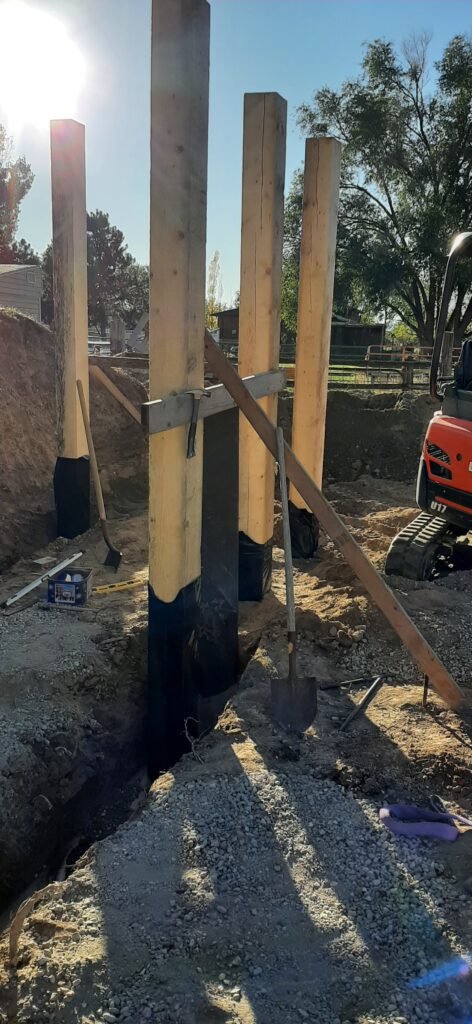
Once all of the posts are placed on an individual foot plank then the trench is filled and soil tamped to ensure the posts have lateral support to ensure they do not move when the beams are placed on them. A 2†by 6†board was temporarily screwed in the posts ensure proper alignment and spacing. The 2†by 6†board was also supported by some support 2†by 4†boards to ensure that the posts stay plumb when back filling and tamping.   The 2†by 6†was also used as a guide when cutting the posts to height.
The roof beams were 8†by 12†cross section in 10-foot lengths. A 2†by 6†board was also used to help with placement of the beams on the posts. It made it easier to place the beams on the posts at the right level and then they could be slid over the posts.Â
Lag bolts (18†long and 5/8†diameter) are screwed through 8†by 12†beam and into the top of each post. A 5/8†diameter hole is drilled though the beam and a ½†diameter hole is drilled into the post before the lag screw is screwed in to fasten the beam to the post. A 1400 inch-pound impact driver makes placing these big lag screws much easier.Â
Once the beams are fastened to the posts, then the 4†by 12†planks are screwed into place on top of the beams using 12†long lag screws where they cross each beam then placement of the 2†by 12†planks on the sides all the way around the structure. Holes are pre-drilled through the boards and a smaller pilot hole is drilled into the boards in order to reduce stress on the boards and make placement of the lag screws easier. A piece of sheet plastic is placed on the floor area of the shelter and around the back side of the posts.Â
The bottom plank on every side is also wrapped in sheet plastic and lag screwed to the side of the posts using 6†long ½†diameter lag screws. The planks should be leveled appropriately before fastening them to the posts. The subsequent planks are placed on top of the bottom planks and fastened to the posts with lag screws without having to wrap them in plastic sheeting. The top planks on the sides may have to be trimmed to the right width.
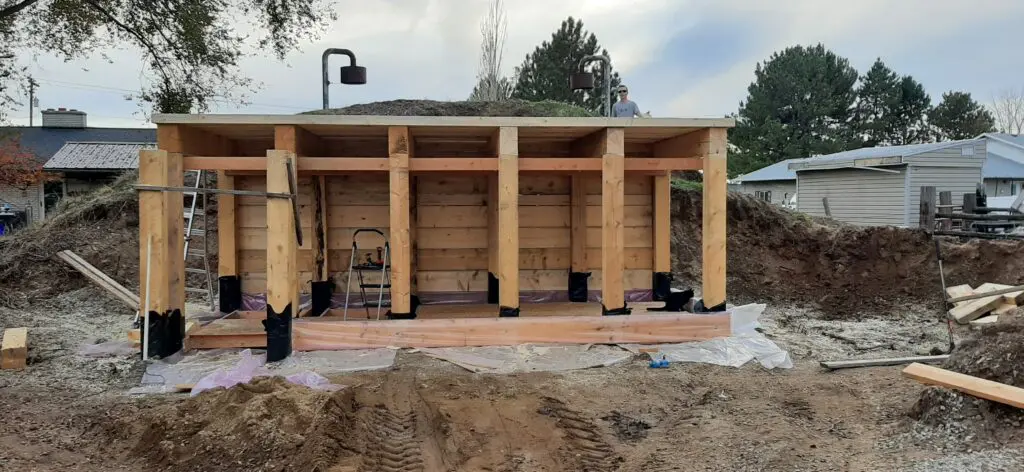
Since a 20-foot plank will not fit through the entry way, one side of the structure was left open while shelving was built into the structure with the same rough-cut lumber. Once the shelving was in place, the planks on the last wall were placed and fastened to the posts. The 2†by 6†and plywood floor structure was also finished while the structure was open before the last wall was finished.
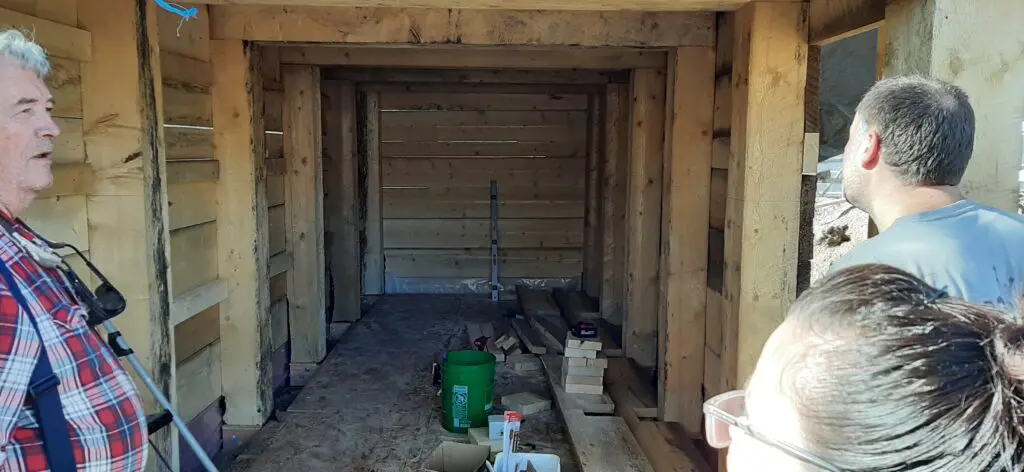
Once all of the walls are finished then some 4†by 4†by 20-foot board are fastened to the structure on diagonals on each wall and across the top planks with 12†long lag screws to provide more structural strength.Â
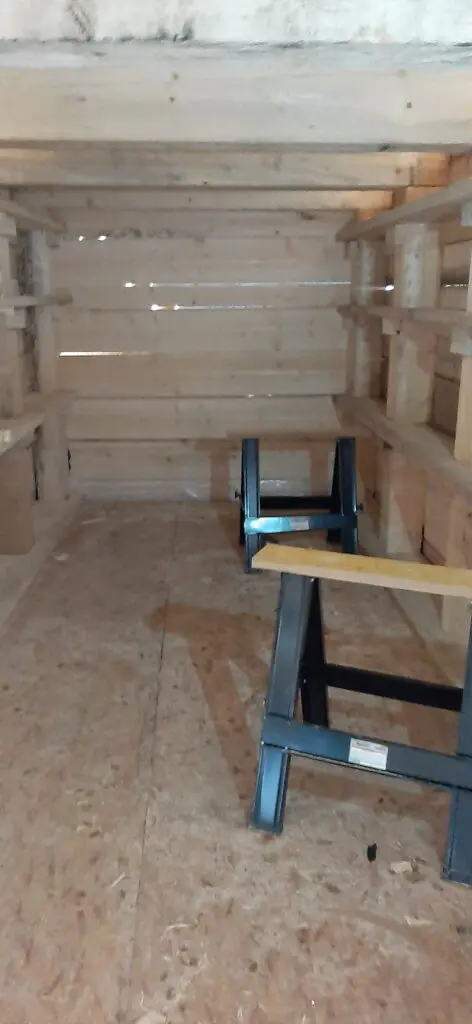
The structure is then covered with 6-mil sheet plastic that is fastened to the structure with roofing nails with the plastic sheeting extending onto the bottom boards that were wrapped in plastic. The structure can then be buried with soil all the way around with roughly 2-feet of soil on top.
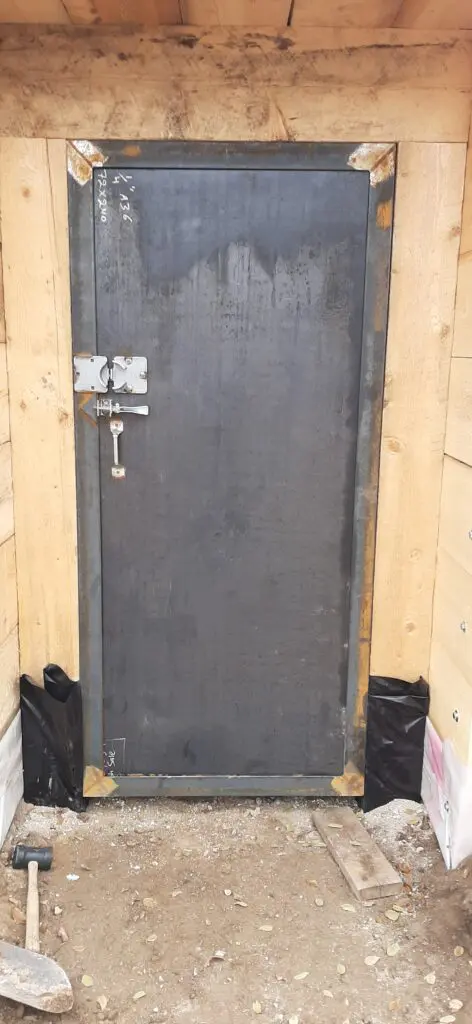
A normal exterior quality door was framed into the inside of the entry way as and environmental barrier and a steel security door was fabricated for the exterior of the entry way.
Costs
The costs reported here were incurred in mid-2021. There has been some inflation since then but recent inquiries indicate that they have not changed substantially. The major costs for the project were $5600.00 for the rough-cut lumber, $1000.00 for the lumber for the floor and 4†by 4†diagonal bracing, $400.00 for the lag screws, $300.00 for the environmental door and $700 for the steel security door. The cost for excavation and burying the structure was roughly $1000.00.
Performance
The temperature of the shelter got down to roughly 34 F during the winter with outside temperatures averaging as low 27 F for a few days at a time. The highest temperature recorded in the shelter was 72 F with over 17 days over 100 F during July. The air in the shelter became somewhat humid during the summer but that was remedied by opening the doors and ventilating the shelter for a few hours when the temperatures were relatively cool outside.
It is estimated that the shelter would provide a protection factor of at least 50 in a radiation event.
A ventilation system will be designed and installed in the near future to support continuous habitation by roughly 6 people during an extended period of time.
This shelter was designed and built by Jay Whimpey PE.
