Article taken from TACDA’s YouTube presentation by Lona Miller, Sandy City Community 4 Leader for Emergency Preparedness
Watch the video HERE
Learning from the Experts
Recently, our community had the privilege of hosting Kathy McMullen from the State of Utah, who taught us essential skills for maintaining sanitation during a disaster. Her key message was simple: preparing for sanitation needs is much easier than you think. She provided hands-on demonstrations, explained the steps, and gave us a list of necessary supplies.
Securing Your Drains
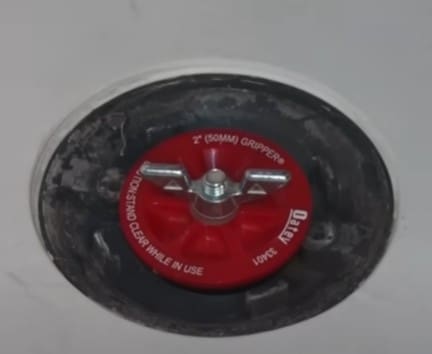
The first step is to check all your drains. Using a screwdriver, either a Phillips (star) head or a flathead, remove the drain cover. Underneath, you’ll find a pipe that leads directly to the sewer system. This pipe is smaller than the drain opening, so measure it with a tape measure.
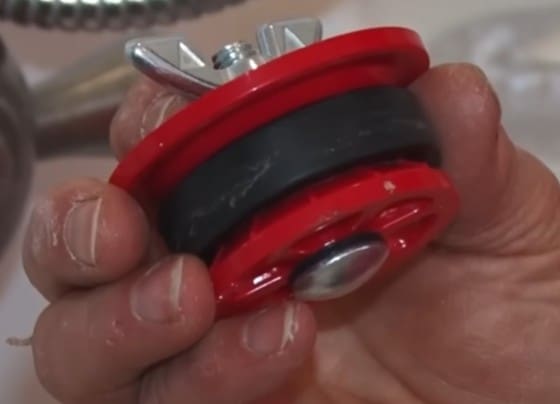
Purchase a test plug from a hardware store (ranging from $3.50 to $6.50, depending on size). Insert it into the pipe, twist to tighten, and it will block both gases and sewage from coming up.
https://www.homedepot.com/p/Oatey-Gripper-4-in-Plastic-Mechanical-Test-Plug-33403D/100204964#overlay
Seal all drains in your home, including sinks. Close stoppers securely and cover sink overflow holes with duct tape to prevent fumes. For bathtubs or hot tubs, take similar precautions.
Don’t forget your washing machine drain; the hook-shaped accordion hose leads directly to the sewer. Cover and secure it tightly with duct tape.
This prevents hydrogen sulfide gas from entering your home, which can cause headaches, nausea, and illness.
Converting Your Toilet into a Dry Potty
When the power is out and water is unavailable, flushing is no longer possible. First, turn off the water supply to the toilet. Remove the tank lid, scoop out any water, and dry the interior completely. Sanitize it thoroughly.
Push remaining water down the bowl into the sewer, then dry and sanitize again. You will now block the sewer connection. Insert a racquetball coated in Crisco (or grease, not oil) inside a tube sock and push it deep into the toilet opening. The grease ensures a tight seal, and the sock allows for easy removal later.
Keeping Waste Safe and Separate
Separate liquid and solid waste. Urine by itself is not dangerous, but when mixed with solid waste, it can cause diseases such as cholera, the leading cause of death after natural disasters.
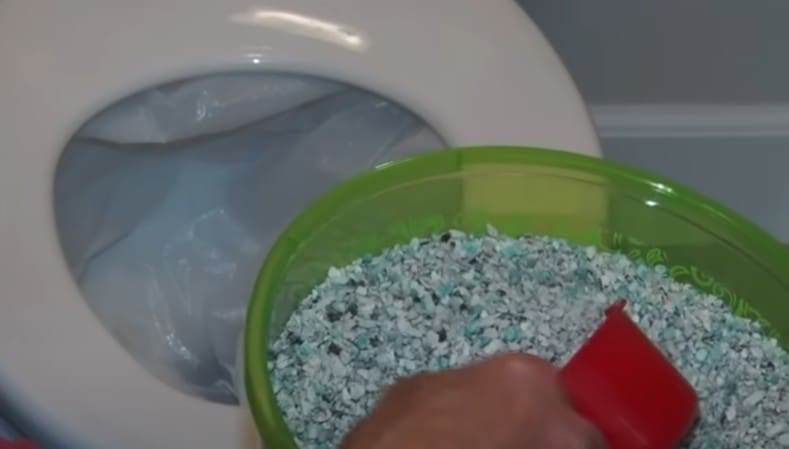
Place a kitchen trash bag or outdoor garbage bag over the toilet bowl for solid waste. After each use, cover waste with kitty litter (or dried ash, sand, or another absorbent material) to control odor and moisture. If some urine mixes in, simply add more litter.
Managing Urine Disposal
For urine, use a five-gallon bucket with a camp toilet lid or a homemade seat made from a pool noodle sliced lengthwise. Dispose of urine in an area away from high-traffic spots and clean the bucket after each use with preserved water and/or paper towels and bleach. No bag is needed for urine-only disposal.
Disposing of Solid Waste
When it’s time to dispose of solid waste, always wear gloves. Dig a hole at least two and a half feet wide and deep for burial. For demonstration purposes, a foot-and-a-half deep hole was shown. Empty the bagged waste into the hole, pressing it down if needed.
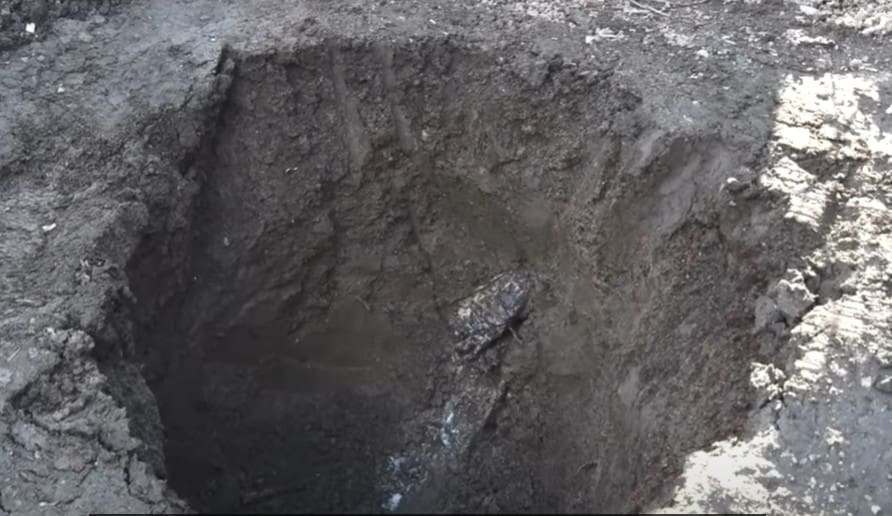
Add one to two inches of kitty litter over the waste, followed by a layer of dirt. When the hole is full, top it with lime to kill bacteria and deter animals. Cover with a board weighed down to prevent access by pests.
Preventing Bugs and Pests
Use food-grade diatomaceous earth around the burial site to deter ticks, fleas, spiders, earwigs, and other pests. This natural product is safe for people, pets, and plants, but deadly to insects that come into contact with it. Re-apply as needed.
Share Your Knowledge
Maintaining sanitation in a disaster is not complicated when you are prepared. By sealing drains, converting toilets, safely managing waste, and preventing pests, you can protect your household’s health.
Now you know what to do. Share this with your neighbors and help them prepare, too. Keep yourself safe.
Things to Keep in Mind
- Racquetball + Crisco seal:
Works for odor control, but in severe flooding or sewage backup, a more solid mechanical seal (like an inflatable plumbing bladder or test plug for the toilet flange) may be more effective. - Burial of waste:
In urban areas or flood-prone zones, burying waste may be restricted or risky if groundwater is high. In those cases, storing bagged waste for later pickup (in lined, sealable containers) may be safer. - Kitty litter vs. Composting:
Clay-based kitty litter absorbs moisture well but does not decompose. If the goal is eventual composting, sawdust or other organic absorbents are preferred. - Urine disposal:
We recommend disposing of urine away from water sources to avoid nutrient contamination. - Legal considerations:
Dumping untreated waste is illegal under normal conditions. This article is intended for a worst-case scenario where all systems have failed; no water, no sanitation, no help. In extreme emergencies, survival and disease prevention become the top priority. Listen closely to your local authorities; they will provide sanitary options if available.